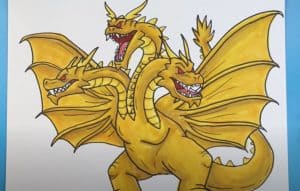
How To Draw King Ghidorah easy with this how-to video and step-by-step drawing instructions. Drawing lessons for beginners and everyone.

Please see the drawing tutorial in the video below
You can refer to the simple step-by-step drawing guide below
Step 1
You can start by drawing a guide shape and guide for the frame for Ghidorah. Three circles for each head and a larger egg shape for the body. Add guides for the face and legs.
Step 2
Sart drew the snout and upper row of teeth. Create cheeks and add small details.
Step 3
In this step, you will complete the first part by drawing the eyebrows forming the horns and then drawing the frills or horns on the back part of the face/jaw. Once done, you can draw the bottom of the mouth and then draw the bottom row of teeth along with the tongue.
Step 4
The second end will be in 3/4 view. Start with the outside first and then work your way up. You are drawing the same face, just at a different angle.
Step 5
Draw the teeth and tongue to complete the second head.
Step 6
The third end is below the second end. You will go about creating the third head of King Ghidorah the same way you did with the other two. Teeth are less visible on this end but everything else is the same shape.
Step 7
Now we will move on to the body. Start by drawing the neck for all three heads and then draw part of the chest, followed by the legs and feet. Add the claw toes and then sketch some texture details for the leg.
Step 8
Finally, you can draw the winged arms and then two of the tails visible on the back of King Ghidorah’s body. The tips of the wings are also clawed to add to that as well. When you’re done, you can start cleaning up the drawing and removing errors and instructions.
Step 9
That’s it, you’re all done. Now you can have fun coloring King Ghidorah. I hope you had a good time. Remember to comment, like and share so others find this King Ghidorah drawing lesson.


