How to draw Fairy Dreams Scenery by pencil with this how-to video and step-by-step drawing instructions. Pencil drawing tutorial for beginners and everyone.
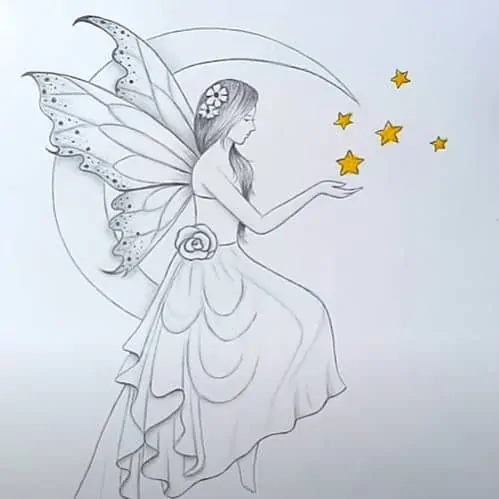
Please see the drawing tutorial in the video below
Fairy Dreams Scenery Drawing Step by Step
Step 1: Create the Basic Frame

Start by drawing a large semicircle to create the main frame of the scene. Then draw a straight vertical line beneath it, as shown in the illustration.
Step 2: Draw the Dress

Begin sketching the girl’s dress, focusing on the flowing shape of the skirt. Lightly outline the main form of the dress before adding more details in the following steps.
Step 3: Sketch the Body and Arms

Continue by drawing the girl’s waist, stomach, and arms. Follow the pose shown in the illustration and keep the lines light and simple at this stage.
Step 4: Draw the Head and Upper Body

Sketch the girl’s head, hair, and facial features. Then add her chest and complete the upper part of her body, connecting it naturally with the dress.
Step 5: Add the Fairy Wings and Legs

Draw the large fairy wings behind the girl, giving them a delicate shape similar to butterfly wings. Then add her legs to complete the main figure.
Step 6: Add the Decorative Details

Now add the flowers and other decorative details to the girl’s dress. Draw the folds and patterns on her clothing, then add several stars in front of the girl to create the magical fairy atmosphere.
Step 7: Finish the Magical Scene

Finally, go over the drawing to make the lines darker, clearer, and more defined. Add the finishing details to the fairy, dress, wings, and decorations. Color the stars yellow to make the scene look more sparkling, magical, and dreamy.


Very pretty
Super fantastic drawing looks like realastic ❤❤
thank you!