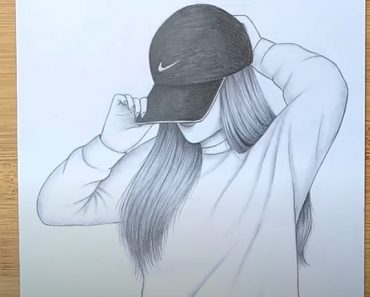
How to paint a beautiful Girl with this how-to video and step-by-step painting instructions. Easy painting tutorial for beginners and everyone.

Please see the painting tutorial in the video below
– Art Incubation Room (Hobby Art)
– Watercolor, drawing, portrait painting, oil painting, landscape painting, drawing, hobby art.
Beautiful Girl Painting Step by Step
Step 1: Preparation
Select a clear and high-resolution reference photo. Make sure it has good lighting and clear details.
Set up your workspace with good lighting, ensuring you have easy access to your materials.
Prepare your canvas or paper by applying a thin layer of gesso if needed, to create a smooth surface.
Step 2: Sketching
Use a light pencil to sketch the basic outlines and proportions of the girl’s face. Pay close attention to the placement of facial features (eyes, nose, mouth), as accurate proportions are key to realism.
Refine the sketch until you are satisfied with the likeness.
Step 3: Base Layer
Start with the background or the darkest areas of the painting.
In acrylic or oil, begin with a thin wash of paint, gradually building up the values and colors.
In watercolor, establish the lightest areas first and work towards the darker areas.
Step 4: Building Details
Begin working on the facial features and the skin tones.
Pay attention to subtle details such as skin texture, shading, and highlights.
Work from the background towards the foreground to ensure the layers dry properly.
Step 5: Adding Color and Shadows
Continue to build up layers of paint to create depth and dimension.
Pay attention to the colors in the reference photo, and mix your paints accordingly.
Use various brush sizes and techniques to blend colors and create smooth transitions.
Step 6: Eyes, Nose, and Mouth
Focus on the eyes, nose, and mouth to capture the girl’s expression.
Work on the intricate details of the eyes, including the iris, pupils, and reflections.
Add shading and highlights to the nose and lips to make them appear three-dimensional.
Step 7: Hair and Clothing
Move on to painting the hair, considering its texture, color, and shine.
Pay attention to individual strands and the direction of hair flow.
If applicable, paint the clothing with attention to folds, shadows, and highlights.
Step 8: Final Details
Continuously compare your painting to the reference photo to ensure accuracy.
Fine-tune details, adjust values, and make any necessary corrections.
Add highlights to the face, hair, and clothing to create a sense of luminosity.
Step 9: Signature and Finishing Touches
Once you are satisfied with the painting, sign it discreetly in a corner.
Take a step back to assess the overall composition and make any final adjustments if needed.
Allow the painting to dry completely before varnishing or framing it.
You can see more beautiful girl drawing:

