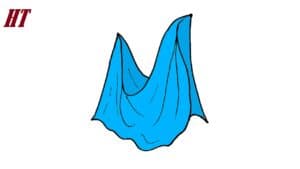
How to Draw Fabric with this how-to video and step-by-step drawing instructions. easy drawing tutorial for beginners and all.

Please see Fabric drawing tutorial in the video below
In this tutorial, I will show you how to draw fabric. This lesson will be very helpful for you because the ability to draw fabric correctly is very important. Such skills can be useful when you are drawing folds of clothes, curtains, curtains or other decorative elements.
You can easily draw the outline of the fabric and the folds. Furthermore, arbitrary lines are allowed here. But pay special attention to shadows and highlights. It is the shadows that will make your drawings more realistic. Fabric is darker in creases and indentations, lighter in indentations. You must describe this in your drawing. To do this, choose several shades of different color intensities. Try to make smooth transitions between colors, then your drawing will look more realistic.
You can color the fabric in the same color as in the example, or you can choose any other color of your choice while using several shades to highlight the lighter and darker parts of the fabric.
Fabric Drawing Step by Step
Step 1. Draw the right edge of the fabric.
Sketch a freeform vertical line.
Step 2. Add curves.
Draw another vertical line that blends into the bottom edge.
Step 3. Sketch the left edge.
At this stage, draw a freeform line.
Step 4. Draw a curve in the center of the fabric.
To do this, sketch a smooth curve.
Step 5. Add the top and bottom elements.
With straight lines, draw the outline of the fabric at the bottom and top.
Step 6. Add details.
Draw two lines in the center to create a large crease.
Step 7. Add the outline of the vertical crease.
Draw a smooth line on the right side, as shown in the example.
Step 8. Draw the final fold.
Add a vertical line on the wrong side of the fabric.
Step 9. Color the drawing.
Use some shades of blue.


