How To Draw Elvis Presley easy with this how-to video and step-by-step drawing instructions. Celebrity drawings for beginners and everyon.
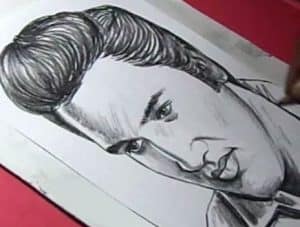
Please see the drawing tutorial in the video below
You can refer to the simple step-by-step drawing guide below
Step 1
Start this first step by drawing out the shape of a large egg for his head. Then outline the guidelines on the face as you see here. Then draw a line for his neck.
Step 2
Now here you will start details about Elvis. Start by sketching his world famous hairstyle starting with the sides just above his temples. When sketching in your hair, gently stroke the straight strands shorter than the others until they look natural. On the left side of the head, draw a contour for the hair. Now you are ready to outline the shape of his bushy eyebrows. Next, define his face shape starting from the left side below his eyebrows and work your way down until you have formed a beautifully structured face with high cheekbones. and all. Now sketch his beautiful full lip line as shown and then draw the lining for his jacket and jawline.
Step 3
In this third step, you will begin to outline the real hair inside of the eyebrow shape that you drew in step two. Then you can start drawing out the shape of his almond eyes along with his eyeballs. Elvis has puffy eyes so sketch the lines to show this feature on his face. You will do this for both the right eye and the left eye. Now start outlining the shape of his wide round nose and then detail his lips a bit more and also outline in a curve for his chin.
Step 4
As you can see, you will spend a lot of time sketching out your nicely shaped hair. You can do this with a series of soft lines that curve slightly inward depending on the position. After doing this, outline the wrinkles on his forehead that he only has three of, then shade in the eyeballs and give him some nice long lashes. Blend lightly under his left eye to contour and outline the creases on his lower lip. Start burning on the right side before moving on to the next step.
Step 5
Erase all the principles you drew in step one before shading anything you see here. You will now begin the shading process in this final drawing and sketching step. If you remember in the previous step, you only sketched a part of his hair. That’s because you’ll be filling the rest with shading. When you shade in the dark areas of your hair, make sure that the bold lines are pointed at the ends but still look solid. Shade one side of the head along with the distal side of the right jaw. Slight shade on the neck and color in the jacket.
Step 6
Here’s what your finished sketch should look like when you’re done. You can color it if you want or you can leave it as a sketch. Either way, they both look good. concluding this tutorial on how to draw Elvis Presley step by step.
Step 7
In this step, I will show you how to create that beautiful shadow effect. Make sure you are using Adobe Photoshop software. This is only for that program. If you don’t have it, you can also skip these steps. First take out your recorder. The property gives it a reasonable size. This size depends on how large the area to be shaded. Set your burn brush to the setting in the image. This will make it easier to control the drop shadow.
Step 8
In this step, we will start the shading process. All you have to do is apply a first coat of paint 6 inches above the stain. Then create another layer of shadow covering that color and make it four inches above the black point. Finally paint a third coat of color over the second shade. Make sure this is extremely dark. As you can tell it looks perfect. I hope this step helped you with better shading!
