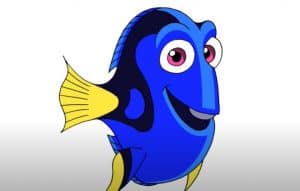
How To Draw Dory From Finding Nemo with this how-to video and step-by-step drawing instructions. Cartoon drawing tutorials for beginners and kids.
Please see the drawing tutorial in the video below
You can refer to the simple step-by-step drawing guide below
Step 1
To get started with Dori, we’ll first need to draw a simple disc shape. This oval will become the bulk of Dori’s body and it’s very narrow to create the effect she was expecting a bit.
Step 2
Next, draw Dori two large eyebrows and a line running across their bottom to line her eyes.
Step 3
Next, draw two circles and position them so that the line from the previous step runs straight through them. This will help you look Dori straight in the eye.
Give her very small lips that make a slight “O” shape.
Step 4
Erase the duplicate lines between Dori’s eyes and smooth out the area between her right eye and her upper lip.
Step 5
Draw the pupil and iris of each Dori’s eyes and give her a really short tail. The reason we made Dori’s tail so short is because it gives the viewer the illusion of being the furthest object.
Step 6
Draw lines inside Dori’s tail and give her another fin near the front of her body.
Step 7
On Dori’s fin, draw a black stripe. Draw Dori’s remaining fin in an “S” shape, facing back towards her mouth.
Step 8
Next, draw a long fin that runs the length of Dori’s back, almost touching her tail.
Step 9
At this point, Dori is nearing completion. All that’s left to do is draw the big black swirl on her back, color her and enjoy!
If you liked this tutorial, share it with your friends and like us on Facebook!
