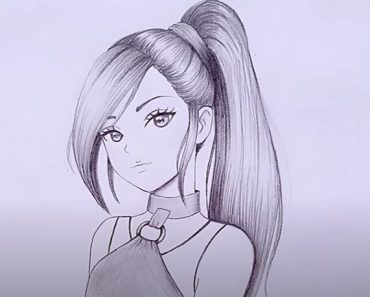
How to Draw Caitlyn from League of Legends with this how-to video and step-by-step drawing instructions. Cartoon girl drawing for beginners and All.
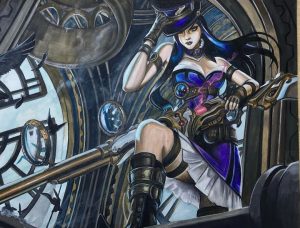
Please see the drawing tutorial in the video below
You can refer to the simple step-by-step drawing guide below
Step 1
As always, let’s start with some instructions. I recommend checking out some of Dawn’s tutorials on how to draw women before settling on this one. Pretty straightforward stuff, here. One tough item is the rifle. Now we’re going to show some parallel guides for that. Her left arm is partially hidden behind her torso, so we’ll only show her lower arm and hand.
Step 2
Okay, you may have to zoom in to see this first step. We’ll start by drawing an overlap that covers part of Caitlyn’s head. It’s a series of lenses mounted on her helmet that help her aim at distant targets. We’ll start by placing some simple loops.
Step 3
The first thing I did here was enhance the lines around the lens. From there, we want to draw a piece to attach the lenses to. Next, draw the swingarm facing up, and finish it off with a round hinge that will attach to her hat.
Step 4
Now for the hat. Caitlyn wears a rather ridiculous top hat, like the Mad Hatter in Alice in Wonderland. Notice how the brim curves down at the front and up at the sides. By joining that line at the edges, we can achieve a certain depth, instead of just drawing a flat shape.
Step 5
Here we will draw some of Caitlyn’s hair, as well as the main shape of her face. The curves of the cheeks and eyebrows meet at the guide line, which is also the eye line.
Step 6
Draw the details of the face. Again, I recommend checking out some of Dawn’s basic tutorials on how to draw faces if you’re having trouble here.
Step 7
Next, we’ll draw the ruffled collar around Caitlyn’s neck, as well as her own neck. We can also add stripes to the hat. There is a brim on the top edge of the hat, so try to show the stripes around that edge.
Step 8
This is the chest part of Caitlyn’s rather revealing outfit. She must live in a warm climate. Anyway, we don’t want to outline the entire curve of the breast here. I drew a bottom curve leading to the remaining breast shape to create creases in the fabric. There is also a frill here.
Step 9
Since the breasts are being pressed into this garment, try to show a little bulge where the exposed bust comes in contact with the top of the fabric. Next draw the shoulder straps on each side. Finish the hair and we can move on.
Step 10
Here we will draw two belts – one at the normal waist level and one just below Caitlyn’s breasts. Since her back is slightly arched, we’re technically looking UP at her ribcage and DOWN at her pelvis. Because of this, the belts will curve away from each other.
Step 11
Fill in the waist and draw the hips. Then scroll down and draw the bottom part of the dress/top she is wearing. There seems to be a slip of some sort under the skirt, so don’t forget that detail.
Step 12
To make things easier, I decided to draw some more detailed guides for the legs. This will give you a general idea of the shapes and curves needed. Notice how the left side (towards us) has an opposite B shape. The other leg (in side view) is S-shaped.
Step 13
Details of the pins. When you get to the ankles, create some creases, as she will be wearing leather boots. We can also see details of the high heel and square toe of the boot here.
Step 14
We’ll have some overlap here, as we draw the straps that cover Caitlyn’s thighs and boots. Trace the buckles on the thigh straps, and draw the top of the boots just below the knee.
Step 15
Detail of boots and straps. Remember to cover the toe shape for the steel toe boots.
Step 16
No exaggeration when talking about arms, here. If you’re having trouble, get some arm references and be sure to look at your hands for finger positions.
Step 17
Using parallel guide lines, we can outline the shape of the rifle and draw the barrels. Draw a small curve to indicate the area where the trigger and finger will move.
Step 18
Now draw in the hand holding the gun, and the rest of the forearm. I highly recommend looking at your own hands for this one. Pick up the house phone or some other object that can mimic the handle of a gun. Remember to leave her finger OFF the trigger, unless you want her to waste ammo.
Step 19
Here, we will draw a series of lens attachments running down the top of the rifle. I counted six lenses, which are nuts. Also draw the hammer back on the ridle.
Step 20
Add some decorative details to the gun handle.
Step 21
For the final step, go through the entire drawing to see what’s missing. Draw away from the shoulders (the important kind), and also lengthen the hair down and outward, blowing in the wind. Detail the hair a bit. Draw in amputee gloves. Add stripes to the bust fabric.
Step 22
The line art is finished. Make sure to go back and erase any lines from the overlapping straps and erase all of your guide lines.
Step 23
…and here is the fully colored work of art. Not bad. Let me know what people think. I hope you enjoyed the tutorial. It’s a bit different from the standard female fighting games, but many of them are on their way. Remember to post your work when you’re done and thank you for watching!
Drawing, sketching supplies and Painting you may need:
- Assorted Color Sharpie Permanent Markers
- Glitter metallic paint pens sparkle water-based marker pen
- White sharpie extra fine paint markers pack oil based
- mixed media sketchbook drawing pad
- Sharpie permanent markers ultimate cosmic color collection
- Crayons for kids and everyone
- Prismacolor premier colored pencils
- Watercolor pens for painting
- Acrylic colour set for painting
- Paper for drawing and Painting
