How to Draw an Electric Guitar easy with this how-to video and step-by-step drawing instructions. Learn to draw for beginners and everyone.

Please see the drawing tutorial in the video below
You can refer to the simple step-by-step drawing guide below
Step 1
Okay, let’s start this first step by drawing a basic outline of the shape and frame for the Razorback guitar. Start by drawing a V-shaped neck and then draw a long and narrow vertical rectangle for the neck of the guitar. You will then draw out the shape of the razor like the body of this uniquely shaped instrument as seen here.
Step 2
Now in this second step you will first align the inside of the V-neck collar and make sure the points are nice and sharp, then add four lines on the top of the neck as shown to you here. Next you will move down to the body and begin to outline the shape of the guitar more precisely. Add more lines on the inside of the guitar near the edges. This will add definition and form to Razorback. You will then add rectangular shapes to the Floyd rose pickups and then also seal the sharp corners on the bottom of the guitar.
Step 3
You have now completed step one and step two and so far you have done very well. What you’ll start doing in this step is add three adjustment keys on each side. Once done you will add more contours on the top of the guitar as shown here and then add rectangles for the antique pickups and then the pickups between. You will then add small ovals for the saddle and then add some lines along the bottom of the guitar body.
Step 4
You’ve finally reached your final drawing step and you’ll now add the remaining detailed shapes and lines to complete the Razorback design. Now you will add all the frets to the neck of the guitar and then draw all six strings in a perfect straight line. Add details to the pickup and then add all the screws. You will then draw out three small circles for the knobs and then the sockets. Erase all the principles and shapes that you drew in step one.
Step 5
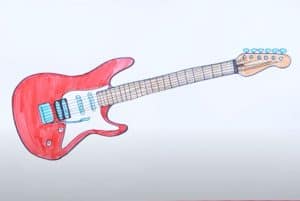
Here’s what your guitar will look like when you’re done. All you have to do now is color it and you have just learned how to draw a Dean Razorback guitar step by step.


