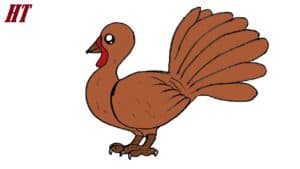
How to Draw an Easy Turkey with this how to video and step by step drawing instructions. Easy animals to draw for beginners and everyone.

Please see Turkey drawing tutorial in the video below
Turkey Drawing Step by Step
Step 1
Since you will be drawing this turkey from the side it will be much easier to draw. Start with a circle for the head, then draw an egg for the body. Connect a large flared shape for the turkey tail and then add paths for the neck and legs.
Step 2
You will now start sketching the actual shape of the turkey’s body starting with the head, neck, chest, and torso.
Step 3
Now, start sketching the turkey wings like that, and then start drawing each tail feather in an enlarged effect. Once that’s done, you can pull out the turkey thighs, (delicious), then make the beak.
Step 4
Finish drawing the beak, then draw the gobbler or caruncles. Create a very friendly eye, then draw the feet and toes. Once that’s done, you can add some feather detail on the wings, then start erasing the lines and shapes you drew in step one.
Step 5
Guess what you guys just did? You just drew an easy turkey. Have fun, everyone. Go ahead and color your big bird and when you’re done you can cut the turkey out and stick or magnetize it in your fridge. Well done guys!


