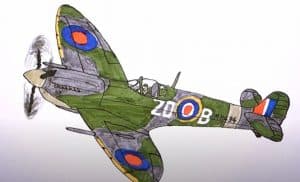
How to Draw a WW2 Fighter Plane with this how-to video and step-by-step drawing instructions. How to draw step by step for beginners and kids.

Please see the drawing tutorial in the video below
You can refer to the simple step-by-step drawing guide below
Step 1
So the first thing to do is to outline the fuselage of the plane as an oblong and narrow towards the nose.
Step 2
At the front of the plane outline the propeller. On the sides we outline the wings, and on the back we draw the tail of the plane.
Step 3
Here we need to start drawing thicker lines. Carefully draw the propeller in front of the plane, making the lines clean and smooth.
Step 4
Using long and slightly curved lines created a WW2 fuselage with a cabin and air intakes at the front.
Step 5
Continuing the lines on the body draw the tail of the World War 2 aircraft with the stabilizer wings.
Step 6
And in the last step of the drawing lesson on how to draw a WW2 plane, we will draw the wings with clear and bold lines.
We think this drawing lesson is much easier than the Ferrari or Ford Mustang example lessons, the main thing is to know the structure of the plane and its parts. The main difficulty is that there are many long lines that are difficult to draw. By the way, we would like to remind you that we also have a tutorial on drawing passenger planes.


