How to Draw a Tesla Car with this how-to video and step-by-step drawing instructions. You will learn how the basic lines come together, giving you the opportunity to be creative while capturing the unique features of this car. The lesson focuses on sketching and coloring techniques, making it easy to follow.

Please see the drawing tutorial in the video below
Tesla Car Drawing step by step
Step 1. Create the Roof
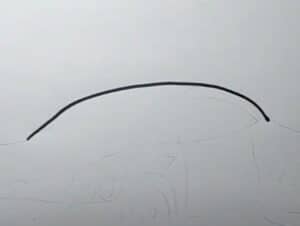
First, draw a curve to create the Tesla roof.
Step 2. Draw the Windshield and Windows

Draw the Tesla windshield and windows on the roof as shown.
Step 3. Add the Front, Hood, and Headlights
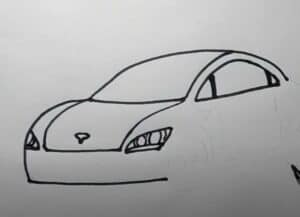
Add the curved shape of the front of the car. Then, attach the bumper to the front base.
Create the outline of the hood. Now, add a small T-shape to outline the Tesla logo.
Draw the headlights on the front of the Tesla.
Step 4. Create the Body
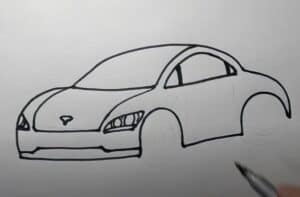
Create the outline of the Tesla body with two ledges for the fenders.
Step 5. Add the Wheels
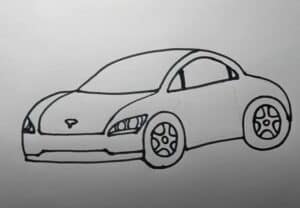
Add cylindrical tires below the fenders of the car. Next, create small round hubcaps. Then, sketch the spokes of the wheels around the hubcaps.
Step 6. Draw the Door Panels
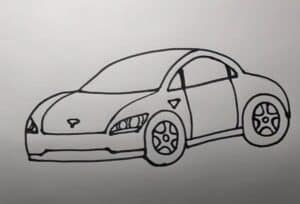
Draw rectangular door panels on the Tesla body. Next, add the triangular camera to the front fender.
Step 7. Coloring the Tesla Drawing
First, paint the body of the car in turquoise. Now, paint the windows and windshield in light blue. Next, paint the tires, fender cameras, and window trims in black. Then, paint the front bumper in dark gray and the Tesla logo in light gray. Finally, use shades of gray for the headlights and wheels.
You can see more car drawings:


4.5
5
4.5