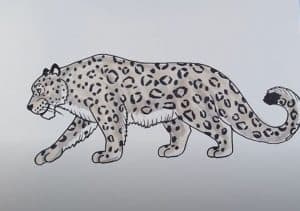
How to Draw a Snow Leopard Easy with this how-to video and step-by-step drawing instructions. How to draw animals for beginners and kids.

Please see the drawing tutorial in the video below
You can refer to the simple step-by-step drawing guide below
Step 1
Draw a snow leopard! On the top of the head, draw a sloping line for the forehead and another sharp line for the nose.
Step 2
Then smile, continue to draw the neck.
Step 3
For the face, draw a small circle and a q, just above, for the eyes and nose. Add some beards!
Step 4
On the top of the head, draw a triangle without the bottom line for the ears.
Step 5
For the body, draw a line along the back, in an upward direction, like you are going up a small hill. Add a circle at the neck, for the chest.
Step 6
Draw the front leg by drawing an upside down L and completing it with a pedicure.
Step 7
From there, draw a line on the body for the abdomen.
Step 8
Draw a circle towards the back of the body to create a thick leg. Make it leaner as you go until you reach your feet.
Step 9
Draw the tail by tracing the question mark upside down!
Step 10
To draw the other back leg, trace the letter L, looping your laces back for the foot.
Step 11
Have fun drawing any kind of shape for your points, drawing on the back and tail. Color it. Have your snow leopard!


