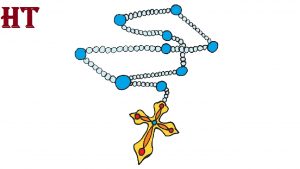
How to Draw a Rosary Easy with this how-to video and step-by-step drawing instructions. Easy drawing tutorial for beginners and everyone.

Please see the drawing tutorial in the video below
You can refer to the simple step-by-step drawing guide below
Step 1
Start off by drawing a fancy cross. Extend the pairs of curves from the center position. The lines should diverge a bit. Note that the lowest pair is longer than the others. Connect the lines at each end using a set of three connected “U” shaped lines.
Step 2
Decorate the cross. Draw a water drop pattern inside each arm. Draw a small circle inside each “U” shaped line.
Step 3
The rosary began. Draw some connected small ovals. Then, draw a larger oval.
Step 4
Continue to draw the beads of the rosary. Draw some connected small ovals. Then, draw a larger oval.
Step 5
Again, draw the beads of the rosary. Draw some connected small ovals. Then, draw a larger oval.
Step 6
Just like the previous step, continue to draw the beads of the rosary. Draw some connected small ovals. Then, draw a larger oval.
Step 7
Continue to draw the beads of the rosary. Draw some connected small ovals. Then, draw a larger oval. Say again.
Step 8
Continue to draw the beads of the rosary. Notice how the necklace curls and curls around.
Step 9
Continue to draw the beads of the rosary. Draw some connected small ovals. Notice how this part of the rosary goes beyond the previous one. Continue the oval line until it connects to the second largest oval from the cross.
Step 10
Color your animated Rosary.
you can see more drawings:


