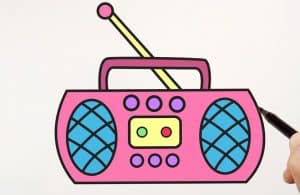
How to Draw a Radio easy with this how-to video and step-by-step drawing instructions. Easy drawing tutorial for beginners and kids.

Please see the drawing tutorial in the video below
You can refer to the simple step-by-step drawing guide below
Step 1
Start by drawing a rectangle with rounded corners. This outlines the front of the radio.
Step 2
Draw a line at a diagonal from each of the bottom and side corners. These will form the side and underside of the radio, giving it a three-dimensional shape.
Step 3
Connect short lines. Make sure the corners are rounded.
Step 4
Draw two large ovals on the front of the radio. These are radio speakers.
Step 5
Draw a rectangle with rounded corners between the speakers. Draw a line parallel to the top of the rectangle, with three small ovals below it. This is the console, or, if yours is a classic boombox, maybe even a cassette deck. Above this, draw two small ovals. Draw a curved line along the edge of each dial, making the control dials look three-dimensional.
Step 6
Enclose a rectangle in a rectangle on top of the scaffold, again rounding the corners. This forms the handle of the radio so you can carry it around.
Step 7
Draw lines parallel to the bottom and sides of the handle, giving it a three-dimensional shape.
Step 8
Glue a narrow horizontal rectangle on top of the radio. Draw vertical lines at equal intervals. From one side, draw a diagonal and another short line to connect it to the top of the radio. These are the controls that let you play, pause, stop, fast forward, and rewind the track.
Step 9
Draw parallel lines at an angle through each speaker. Then draw straight lines at an opposite angle.
Step 10
Color your cartoon station.


