How to Draw a Pizza Box with this how-to video and step by step drawing instructions. With 9 easy steps to follow, beginners will enjoy designing their own pizza box on paper. Also included is a printable version of this pizza box drawing lesson.
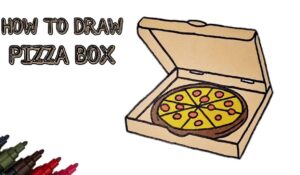
Please see the drawing tutorial in the video below
You can refer to the simple step by step drawing guide below
Step 1. Sketch the base of the pizza box
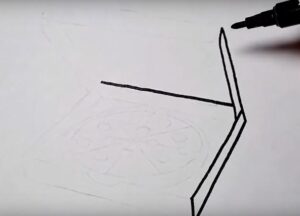
First, outline the cardboard bottom of the pizza box by drawing a trapezoid as shown here.
Step 2. Attach the top part
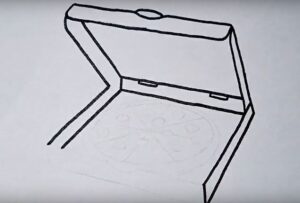
Attach the top of the pizza box to the base as shown.
Step 3. Draw the lid of the box
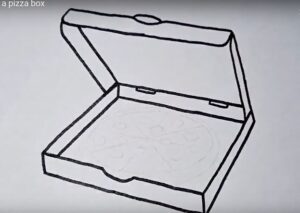
To draw the flaps on the top part of the pizza box, create a line parallel to each edge of the box. Then, connect the ends of each created line to the corners of the box. Also do this to form the bottom of the pizza box as shown.
Step 4. Shape the Pizza
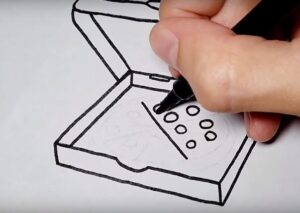
Now, let’s shape the pizza. Draw a circle around the pizza box. Erase the bottom part of the pizza that overlaps the edge of the box.
Step 5. Sketch the Pizza crust
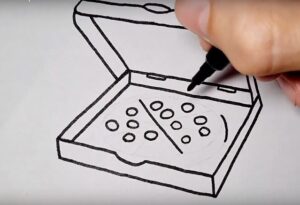
Outline the pizza crust by drawing a squiggly line following the shape of the pizza.
Step 6. Draw the pizza slices
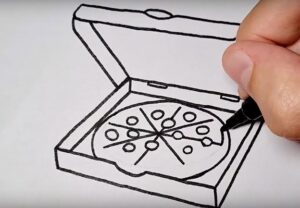
Cut the pizza into eight equal sizes. First, draw a vertical line and a horizontal line through the center of the pizza. Next, draw diagonal lines in opposite directions on the pizza through the center again.
Step 7. Add Pizza Toppings
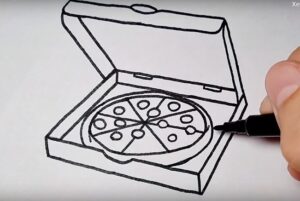
Our pizza wouldn’t be complete without the toppings! Add pepperoni slices by drawing circles on the pizza. You can also add chili by drawing a small crescent shape.
Step 8. Draw the box interior
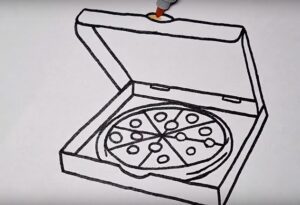
To add depth to our pizza box drawing, let’s draw the inside of the pizza box as shown.
Step 9. Complete the Pizza box drawing

Complete the drawing by coloring the pizza box with a brown pencil. Color the pizza crust with an orange pen and the center of the pizza dough with a lighter brown or yellow pen. Don’t forget to color the pizza toppings! Color the pepperoni slices with a red pencil and the peppers with a green pencil.

