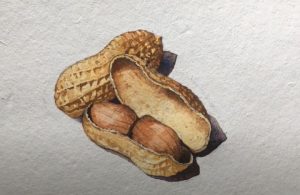
How to Draw a Peanut easy by pencil with this how-to video and step-by-step drawing instructions. How to draw step by step for beginners and everyone.

Please see the drawing tutorial in the video below
You can refer to the simple step-by-step drawing guide below
Step 1
First, we draw a circle that looks like an hourglass. As you can see, this figure is not symmetrical. Try to make the smoothest lines, avoid torn and broken edges and shapes. Also, don’t try to duplicate the exact shape of the shell as in our example, because in practice, you rarely find exactly the same peanuts.
Step 2
Now let’s work on the texture. It is much easier than it seems. We draw long wavy horizontal lines. Between them, draw short vertical lines with a slight twist. Don’t try to make these lines too dark if you want the structure of the nut shell, not the net or the net. If you got everything right, then you will get such a drawing.
Step 3
And as always in the last step, we use the hatch feature to draw the shadow. Please don’t forget to outline some simple shadows on the surface, so as not to create an image of an object suspended in the air. When drawing shadows, consider bends and unevenness on the nut surface. It will make your peanut painting more realistic.
We hope you have a great result. If you have any difficulty with drawing, write about them in the comments. We will take this into account in subsequent drawing lessons. By the way, don’t forget our social networks, such as Pinterest. The fact is that there we publish greatly simplified versions of all of our drawing lessons (and this one), you can save it as an image and use it as a Type cheat sheet in difficult times to draw.


