How to Draw a Pagoda easy with this how-to video and step-by-step drawing instructions. Easy drawings for beginners and everyone.
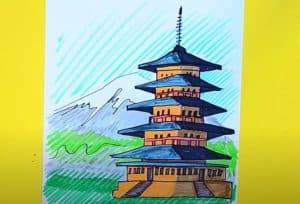
Please see the drawing tutorial in the video below
You can refer to the simple step-by-step drawing guide below
Step 1
First of all, I used a few pictures of temples as a reference but I did not copy any of them. You can do that if you want but I encourage you to create your own design for your temple using this tutorial and other images for reference. That will make this drawing less stressful for you. The most important tool you will need for this drawing is some kind of straight edge. I personally used the T-square because it makes creating parallel lines much easier. If you don’t have a T-square, use a regular ruler. For pencils, I decided to use 2B and 4B pencils. I used 2B for detailed contours/shadows and 4B for outlines/light shadows. You can use any pencil that works for you. The only reason I use these two pencils is because I want to try a new combination. You can certainly complete this entire drawing, or any drawing, with just one pencil if you want to.
Step 2
Start with a very simple framework for pagoda. Start with a vertical line down the center of your paper. Add a horizontal baseline above the bottom of the paper and a slightly shorter line below the top of the paper. Make sure your lines are centered. Connect the top line with the bottom line to form a closed trapezoid. Adding four horizontal lines creates five sections. Make the sections decrease in size as they get closer to the top. This is the most important step so take as much time as you need for it.
Step 3
Start building on what you have from the bottom up. Basically, you want to define your roof and the front walls of the building. You will be able to see more and more rafters underneath the roof as you go up due to perspective.
Step 4
Sketch the rest of the walls and roof. Add a small column on top for “nine loops.” At this point, you should make sure your point makes sense. Each section gets smaller in proportion as it nears the top of the page.
Step 5
Start adding definitions from the bottom up. I added a few more features to the first floor, mainly another roof below the main roof and some division in between the walls. I also added a platform and base for some stairs that will lead into the pagoda.
Step 6
This will start to get a little more complicated now that you start adding more sections. The main things you should worry about in this step are the roof tiles and the columns on the walls. Notice how the roof tiles become more inclined as they get closer to the edges of the roof. This is an important detail that will add depth to the drawing. Make sure that your vertical and horizontal lines are parallel, the easiest way to create parallel lines is a T-shape.
Step 7
Start adding details section by section, bottom to top. Make your lines a little darker to add more definition. This is the final contour layer to make your contours as clean as possible.
Step 8
Add details to the rest of the first floor and its roof. There are a lot of little details and chances are you’ll miss a few here and there, that’s okay. You can add more details later in the drawing process. You just want to make sure you have a solid outline base for future shading.
Step 9
Start work on the next two floors up. Start by adding simple divisions. This will also be your template for the rest of the floors.
Step 10
Add some more sections to the walls and roof. Pay attention to the direction of the line when drawing the trusses on the underside of the roofs.
Step 11
Start detailing your shadow from bottom to top again. Remember you don’t have to design your pagoda like mine. You can make the shape as simple or complex as you want just make sure your outline is clean and bold.
Step 12
Details of the next floors. Note that you can see more of the undersides of the rooftops as you get closer to the top. Don’t forget to add curved beams on the roof. These will give the temple a more oriental look.
Step 13
Start separating the top floors. The “9-round” segment is also divided into about nine parts. Make sure that the curves are upward to add the illusion of perspective.
Step 14
Add more sections to the top layers just like you did in the previous steps.
Step 15
Start adding details again from the bottom to the top. You want to make sure you can see a little more of the rafters under the taller roofs.
Step 16
Identify the top floor and “9 loops”. Try to make sure that there are actually nine rings for authenticity! Look through your line art and take a deep breath! It all goes straight from here.
Step 17
Start shading in the same way from bottom to top. You can use any shading technique that you are comfortable with. I used 4B graphite and paper towels to add some shading to my background. Then I selected the 2B pencil for all my detail shadows.
Step 18
Shade on the rest of the first floor. As you move along with your shadow, you will most likely find yourself having to review your contours again. Try to use a straight edge as you go through the lines in these final steps. The last thing you want now are unstable lines.
Step 19
Start working on the next two floors and add shadows to the background. There are many ways that you can use to create shadows. You can start with your lightest values and gradually add your darker values. You can also start with your darkest and save your brightest for last. I randomly go between these two methods depending on my mood.
Step 20
Shade on the rest of the 2nd and 3rd floors.. You may find yourself needing more detail for the lower floors here and there. There are a lot of small details in this drawing so make sure to take your time.
Step 21
You are almost there! Start adding shadows to the rest of the pagoda and the background. These last steps can be the most rewarding, but also the hardest to complete. Just keep trotting and look back at the rest of your drawing for inspiration.
Step 22
See in detail the rest of the top section as well as the “9 loops”. I went ahead and added some atmosphere to the background and smoothed out my shading with a paper towel. If you rub the paper towel soft enough, you will only affect your shade and won’t lose your contours. You can also use a 4B pencil and darken your shadows and work on your wood textures. I really hope you find this drawing as challenging as I did and that you learn as much from it as I have. Let me know how you do with it or if you have any questions for me.
