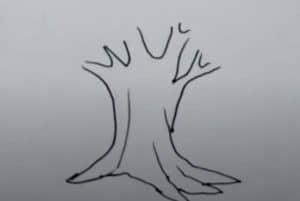
In this quick tutorial you’ll learn how to draw a Mango Tree in 5 easy steps – great for kids and novice artists. The images above show what your finished painting should look like and the steps involved.
Please see the drawing tutorial in the video below
You can refer to the simple step-by-step drawing guide below
Step 1: First, draw the roots. Draw a few wavy lines in a small row.

Step 2: Draw the next trunk. Draw a long line on both sides of your roots, dipping in the center and facing out.

Step 3: Then draw the branches of the tree. Extend the lines out a line from your trunk and then draw a curved “V” on the inside of those lines.

Step 4: Now, it’s time to draw the leaves. In a circle whose base is the top of the stem, draw small humps. Add a bunch of small bumps inside your tree for extra detail.

Step 5: Finish by drawing the fruit. To draw a mango, draw a slightly concave oval towards the bottom of one side. Add a small line going up from the top of the mango to make it look like it’s hanging from the tree. Repeat this on the entire tree.

Interesting facts about the mango tree
The Mango tree grows naturally in Southeast Asia and East India. They are a tropical plant that can grow from 115 to 130 feet tall. When the Mango tree leaves for the first time, they are purple, then turn dark green. The fruit is round and can be red or yellow. The fruit that appears after the plant has flowered is a small bunch that will bloom together. The Mango tree produces mangoes that are shaped like pears, but have their own distinctive flavor. Some people compare it to a peach. Mangoes will ripen on the tree 4 to 5 months after the inflorescences bloom.
You can see more:


