How to draw a Honey with this how-to video and step-by-step drawing instructions. Easy drawing tutorial for beginners and all.
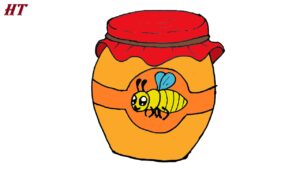
Please see Honey drawing tutorial in the video below
You can refer to Honey simple step-by-step drawing guide below
Step 1: Draw the shape of the jar
Start by drawing a slightly curved horizontal line for the bottom of the jar. Then, draw two vertical lines on each side that curve slightly outward as they go up, meeting a curved line at the top. This will form the basic shape of the vase.
Step 2: Add details
Add details to the jar. Draw a curved line across the top to indicate the lid. Then, add two small curved lines on either side of the jar to make the handles.
Step 3: Draw honey inside
Sketch the honey inside the jar. Draw a wavy line at the bottom of the jar to represent the surface of the honey. Create irregular lines to show off the thickness and texture of the honey. You can also add a few drops that run down the side of the jar to show that the jar is full of honey.
Step 4: Add Labels or Decorations (Optional)
You can add labels, stickers or any other decorations to the jar to make it more interesting. For example, draw a label with the word “Honey” on it or draw a picture of a bee on the jar.
Step 5: Color your drawing
Finally, color your honey pot drawing. Honey is typically golden yellow, so use shades of yellow and brown to color the honey inside the jar. You can also add shadows and highlights to make your drawing look more realistic.
No Responses