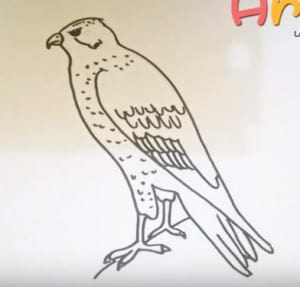
How to draw a hawk easy step by step with this how-to video and step-by-step drawing instructions. Easy animals to draw for children.

Please see the drawing tutorial in the video below
You can refer to the simple step-by-step drawing guide below
Step 1
Start drawing the hawk head. Draw a “U” upside down. In the top left corner, add a small pointed pin. Point of the mine just down.
Step 2
Draw big round eyes just behind the mine. Add the short stream under the beak to make the mouth. There is a curve from the left of the letter “U” on the left almost to the right.
Step 3
Next draw a long curve down the back. It starts at the top right and the curve out and slightly at the bottom.
Step 4
From the bottom of the head line on the left depicts the belly curled down with a small bump at the bottom for the legs. Now add wings. Start right below the head and strong wing curve almost to the abdominal tract and down an angle along the abdominal tract. The lower part of the wing extends below the back. Then it bends up to join with the following line.
Step 5
At the bottom of the abdomen on the abdomen draw the claw on the leg. The front leg has two sharp claws on the front and a sharp claw at the back. The other leg is slightly behind the first leg. Add a claw to the back of the foot. At the bottom of the wing add some long tail feathers. Jagged jagged roads combined with back roads.
Step 6
Finally draw two lines to create a branch for the hawk to perch.


