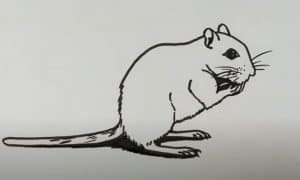
How to Draw A Gerbil easy with this how-to video and step-by-step drawing instructions. How to draw animals for beginners and kids.

Please see the drawing tutorial in the video below
You can refer to the simple step-by-step drawing guide below
Step 1
You will start this drawing lesson by creating two shapes, one for the head and one for the body. Next, connect both shapes by drawing a line at the chest and back, then follow a guide line for the face.
Step 2
Begin sketching the shape of the gerbil’s head structure starting at the bridge of the nose, and then the forehead. You will draw short round ears, then add that little feather on top of the head like that and also to give volume to the mouth and eyes.
Step 3
Using the face guides you drew in step one, you will now start drawing almond shaped eyes and before coloring you should know that gerbils can have ruby red eyes or eyes. straight black. Sketch some whiskers, and hint at the tip of the nose, as well as the ear detail as shown.
Step 4
Now it’s time to start drawing the gerbil body. Starting behind the ears, slowly pull the neck and arch back. You will then draw in the front of the neck and chest as well as an arm and foot or forefoot.
Step 5
Gerbils have kangaroo-shaped hind legs and feet, keep that in mind when starting to withdraw the hind legs and one foot. Add the toes like that and draw at the bottom to the belly.
Step 6
Finally, draw the other hand or foot, then draw the hind leg and the other foot. Sketch at the long tail and remember to outline the bun at the top. Draw fur marker lines and then erase the shapes and lines you drew in step one.
Step 7
Here’s what your furry friend will look like when you’ve finished drawing your gerbil. I hope you’ve had success with this tutorial, now you can show everyone what you’ve created. Thank you guys and remember to join me with another lesson.


