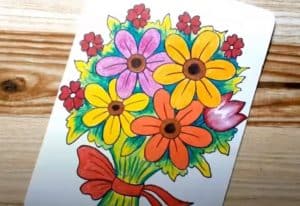
How to Draw a Flower Bouquet easy with this how-to video and step-by-step drawing instructions. Flower Drawing tutorial for beginners and kids.

Please see the drawing tutorial in the video below
You can refer to the simple step-by-step drawing guide below
Step 1
Start off by drawing your first flower. Draw a circle to form the center of the flower. Then, surround the circles around the center using “U” shaped lines. These are the petals of the flower.
Step 2
Draw a second flower. Draw a small circle for the center of the flower and use “U” shape lines to surround the petals.
Step 3
Draw the third flower. Draw a circle to form the center of the flower. Then wrap the petals using “U” shaped lines.
Step 4
Next, you will draw another flower – the tulip. From behind one of the first flowers, stretch a pair of parallel lines to form the stem. At the end of the lines draw a large “U” shape. This forms the lower part of the flower. Next, use a series of curves in the “W” shape to connect the ends of the “U” around the flower. Repeat this process on the opposite side of the bouquet to draw another tulip.
Step 5
Using a “U” shape line and a “W” shape line, draw another tulip peek behind the other flowers.
Step 6
Next, outline the green plant or the leaves of the bouquet. For each leaf, use two curves that meet at a point at the end. Leave the connecting leaves on the bottom, filling the gaps between the flowers.
Step 7
Continue to draw more overlapping leaves until all the shape of the bouquet is gone. Detail some of the leaves by drawing a veil, a downward curve in the middle of the leaf.
Step 8
Fill your bouquet with many smaller flowers. Draw two parallel lines for the stem and a circle for the center of the flower. Then stretch a curve to wrap the petals. Notice the ripple pattern at the end of each petal. Repeat until your bouquet is as full as you want it to be.
Step 9
Draw the branches of the bouquet. Stretch a pair of straight lines downwards, leaning towards each other. Connect the lines by enclosing a flat, irregular shape. This will create a ribbon tied around the bouquet. Stretch another set of lines from the ribbon and connect these lines with a series of connected, serrated, curves. Paste the water droplets to form the ribbon’s bow, and the line pairs end with a “V” shaped line to form the ribbon’s cut ends. Trunk detail and ribbon with curves
Step 10
Coloring your bouquet, but don’t stop there. We have lots of other flower drawing tutorials for you to choose from.


