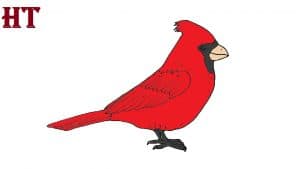
How to Draw a Cardinal Bird Easy with this how-to video and step-by-step drawing instructions. Bird drawing for Beginners and kids.

Please see the drawing tutorial in the video below
You can refer to the simple step-by-step drawing guide below
Step 1
To begin our lesson, we will first need to draw a large wedge. Think of it as a capital “D” on its side.
Step 2
Next, draw a triangle in the top corner of the wedge, and place a small circle in the center. This will become the basic outline of the cardinal’s head.
Step 3
Erase your overlapping lines and draw a small triangular beak next to the cardinal’s eye.
Step 4
Next, draw a jagged outline around the cardinal’s beak. This will become a black hair patch later on. Also let’s add some feather details to the top of the cardinal’s head.
Step 5
Draw a triangle that extends down the back of the card to form its wings.
Step 6
Inside the triangular wing shape, draw some lines running along it to make some feather details.
Step 7
Next, draw the cardinal’s long tail that extends behind the bird. The tail should be slightly thicker near the body and thinner towards the tip of the tail.
Step 8
Just like the cardinal’s wings, draw a few lines at the tail to suggest the long feathers.
Step 9
Now we need to put our cardinal somewhere to park. Draw a large stick or tree branch underneath your bird as shown in the image. Feel free to make the branch as rugged or as smooth as you want.
Step 10
Next, draw two thin legs extending out from the lower part of the card body, touching the stick.
Step 11
Finally, draw a few thin toes at the end of the card pins that wrap around the tree branch shape.
Step 12
Now we need to give our cardinal some color. Of course, there wouldn’t be any complete cardinals without a few bright red feathers. And that is it! I hope you enjoyed learning how to draw a card with me. If you did, be sure to check out the rest of our tutorials and share them on social media. Have fun drawing!


