How to draw a Boxer Dog easy with this how-to video and step-by-step drawing instructions. Dog drawing tutorial for beginners and everyone.
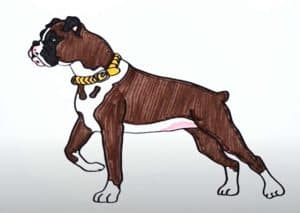
Please see the drawing tutorial in the video below
You can refer to the simple step-by-step drawing guide below
Step 1
First, draw the top of the boxer’s head. This is the part that will contain the eyes and ears. Leave an opening on the right side for the bottom of the head.
Step 2
In the opening, draw the bottom of the head. Also give your drawing some detail by adding eyes and points for the beard.
Step 3
Now it’s time to draw the nose and mouth. Remember, boxers have very soft cheeks called jowls, so they will fold down on both sides of the mouth.
Step 4
Next, draw the ears. Put one in the hole on the side, and the other in the back. Boxers have long, pointed ears that stand up when they hear something important.
Step 5
Now draw the back side. The body is long and it has a short, pointed tail. Think of a triangle with only two sides.
Step 6
Then draw the hind legs and the lower part of the body. Make sure to leave room for the front leg.
Step 7
The next step is the front foot. Also draw the neck, connecting the front legs and head.
Step 8
Finally, draw the other two feet, sticking out from behind the foot you drew.
Drawing, sketching supplies and Painting you may need:
- Assorted Color Sharpie Permanent Markers
- Glitter metallic paint pens sparkle water-based marker pen
- White sharpie extra fine paint markers pack oil based
- mixed media sketchbook drawing pad
- Sharpie permanent markers ultimate cosmic color collection
- Crayons for kids and everyone
- Prismacolor premier colored pencils
- Watercolor pens for painting
- Acrylic colour set for painting
- Paper for drawing and Painting
