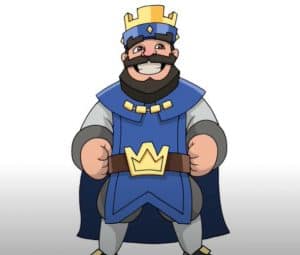
How to Draw a King easy with this how-to video and step-by-step drawing instructions. Easy drawing tutorial for beginners and everyone.
A king is a ruler of men. Today, we often think of a king ruling an entire country. However, in ancient times, kings often ruled over tribes, cities or counties.
Because of their prominence, kings are often depicted in art. For example, the Pharaohs were kings of ancient Egypt. Their images are recorded on painted statues and tombs. Thereafter, kings will be depicted on canvas, coins and postage stamps.
Please see the drawing tutorial in the video below
You can refer to the simple step-by-step drawing guide below
Step 1
Start by drawing an oval. This will help you form the king’s head.
Step 2
Draw the crown. First, draw a curve through the top of the oval. Then draw curves up from each end. Draw a series of inverted “V”-shaped points above the crown and connect them with “C” shaped lines. Draw curves between these vertices and another parallel line with the bottom of the crown. Draw some circles around the crown to denote the jewelry.
Step 3
Sketch the king’s face using a curve. Notice the concave at the bottom of the circle. This will form the crown of the king’s beard.
Step 4
Draw a “C” shaped ear on each side of the face and detail its insides with a curve. Draw curves from the crown to the ears to indicate the hair. From under the ears, stretch curves that meet at points gently below the chin, outlining the beard. Use curves to draw rounded triangles of hair below each ear.
Step 5
Detail of the king’s face. Includes pointed, curved shapes that indicate eyebrows. Below each line, draw a series of lines to surround the square shape of the eye. Fill in a circle on each side to represent the pupil. Draw the nose using a “C” shaped line and use curves that meet in points to outline the mustache. Use a curve to surround the mouth below the mustache.
Step 6
Draw the king’s royal attire. Use pairs of long and curved lines to draw the edges of the cape. Draw a large circle to represent a belt buckle and connect it to the edges of the cloak with lines. Use curves to outline the square shape of his trouser leg.
Step 7
Use the curves to outline the side of the gown, sleeves and cuffs. Then, outline the fingers, palms and thumbs.
Step 8
Stretch a pair of curves to form the other arm and use the curves to wrap the cuff. Paste irregular circles of thumb and fingers using curves.
Step 9
Use the curves to surround the rounded rectangles that make up the top, sole, and tongue of the shoe, as well as their buckles.
Step 10
Color your king. Red, purple, dark blue and yellow are often considered royal colors.
