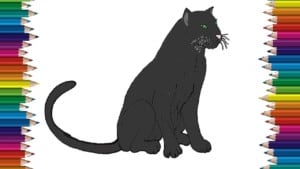
How to Draw a Black Panther with this how-to video and step-by-step drawing instructions. A black panther is a melanistic color variant of leopards (African) and jaguars (American).

Please see the drawing tutorial in the video below
You can refer to the simple step-by-step drawing guide below
Step 1
Let’s start painting a leopard that looks at the whole body. Draw the path. Try to draw these instructions correctly, as your future progress will depend on them. These guidelines serve as a platform. You do not have to draw the perfect thick lines, just the same size.
Step 3
Draw head and neck. Remember: the ears are small and the cranium is quite flat.
Step 4
Draw the short front legs and muscles with large rounded feet. Try not to create more ‘caricature’ feet. Big cats actually have flat but bulky feet that level up depending on the certain surface.
Step 5
Draw the rest of the body: smooth belly, back, hind legs and long tail. Because we are drawing a real leopard, the body will be a little longer, with longer legs. Note how the hind leg arch is not as prominent as the cartoon style.
Step 6
Add your eyes, nose, mouth, ear details and correct the shape of your head.
Step 7
Add beard, feathers, muscles and other details and you’re done! Using thin lines for specific details, you do not want to use bulky lines or it will take away from the outside line.
Step 8
Now let’s examine near the leopard eye.
Step 9
The panthers have large rounded feet with retractable claws that they use to climb trees and cling to their prey.
Step 10
Finally, fill the leopard with black so that it looks more realistic.
You can refer to the tutorial How to Draw an Oyster with a video tutorial and step by step guide on my site.


