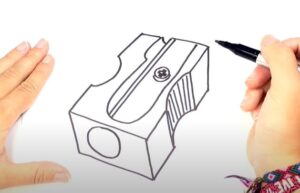
How to draw a Pencil Sharpener with this how-to video and step by step drawing instructions. All drawing steps are included here which make it fun and simple to follow! Expect this drawing to require about twenty-minutes, but the creative process can actually take more time if more details are created in addition.

Please see Pencil Sharpener drawing tutorial in the video below
You can refer to Pencil Sharpener simple step by step drawing guide below
Step 1. Sketch the Pencil Sharpener
Start by drawing the rectangular body of the pencil sharpener.
Step 2. Add grinding holes
Next, draw a circle on the edge of the sharpener to create the sharpening hole where the pencil enters.
Step 3. Shape the grinding blade
Draw a thin rectangle on the tip of the sharpener to represent the sharpening blade.
Step 4. Add screws
Now, draw a small circle to illustrate the screw that secures the sharpener blade.
Step 5. Draw the pencil pieces
Finally, add zigzag lines around the sharpener to represent the pencil case.
Step 6. Complete the pencil sharpener drawing
Let’s complete the pencil sharpener drawing by using bright colors to make it stand out! First, shade the body of the sharpener with a yellow pencil. Use a darker yellow to color the inside of the sharpener. Next, take the gray pencil and fill in the blade and screw. Then, color in the pencil scraps around the sharpener with brown and red pens.


