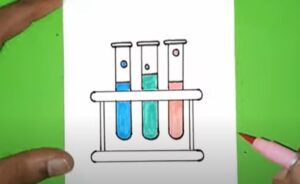
How to Draw a Laboratory with this how-to video and step by step drawing instructions. Included are 6 easy steps to follow, kids will enjoy drawing their own science lab on paper.

Please see Laboratory drawing tutorial in the video below
You can refer to Laboratory simple step by step drawing guide below
Step 1. Form a laboratory table
Draw two long horizontal lines to form the top of the lab bench. Then, draw vertical lines to outline the drawers.
Step 2. Draw a cup and a vase
Form the shape of a cylindrical beaker and a conical flask as shown in the illustration. Add a horizontal line inside each shape to outline the liquid inside.
Step 3. Add a graduated cylinder
Draw a tall cylinder as the graduated cylinder and add horizontal lines to represent measurement marks.
Step 4. Create a test tube holder
Now, create a rectangle to make the test tube holder.
Step 5. Sketch the test tubes
Draw thin, vertical shapes inside the test tube rack to add test tubes.
Step 6. Complete the laboratory drawing
Let’s add some color to your lab drawings! Use a light blue pencil to color the laboratory glassware. Use dark red for the base of the graduated cylinder. Next, fill the inside of the glassware with liquid in vibrant colors like pink, green, and purple. Now, use brown to color the test tube rack. For the lab bench, color the top dark blue and color the drawers light blue. Finally, use a light blue pencil to paint the wall.


