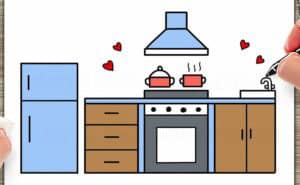
How to Draw a Kitchen with this how-to video and step-by-step drawing instructions. Learn to draw Kitchen easy for beginners and kids.

Please see Kitchen drawing tutorial in the video below
I invite you to a new lesson in which I will show you how to draw a kitchen. I promise that the lesson will be interesting and useful to you.
This step-by-step guide is designed specifically for beginners. Here, you will learn how to draw a kitchen step by step. In this lesson, you will learn how to draw some objects that are familiar to us. In the picture you see a kitchen table, built-in cabinets, refrigerator and oven.
You may have drawn these objects separately, but in this tutorial you will draw everything at once. To complete the lesson well, you’ll need the ability to create straight, straight lines. It uses simple geometric shapes that you can easily repeat.
Kitchen Drawing Step by Step
Step 1. Draw the floor.
This is a simple step where you have to draw a horizontal line.
Step 2. Describe the refrigerator.
Draw straight lines to form a rectangle.
Step 3. Refrigerator details.
Draw a horizontal line to separate the two compartments of the refrigerator. Add handle.
Step 4. Add the surface of the stove and the table.
Draw a horizontal rectangle and draw a horizontal line.
Step 5. Draw the furnace and divide the board into arcs.
Draw a rectangle to draw the oven and add a drawer.
Step 6. Add details.
Put the pot on the stove and put the cup on the table.
Step 7. Add details.
Outline the outline of the wall cabinets and add the rest of the elements.
Step 8. Sketch the clock and wall cabinet details.
Draw two circles and add arrows. Draw a vertical line on the cabinet and add two round handles.
Step 9. Color the kitchen.
You can choose any color for the drawing.
You can see more drawing:


