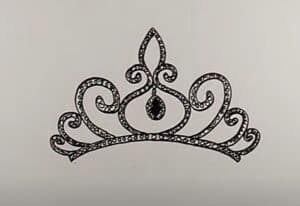
How to Draw a Queen Crown with this how-to video and step-by-step drawing instructions. Learn to draw for beginners and everyone.

Please see Queen Crown drawing tutorial in the video below
So I am happy to give you this drawing lesson through which you will learn how to draw queen crown step by step. The queen’s crown is a special headdress worn by kings and signifies their power and strength.
Any novice artist or child can easily complete this lesson as it doesn’t contain any hard-to-find elements. To draw a beautiful queen crown, you need to be able to draw circles.
Usually, queen crowns are made of precious metals and diamonds. You can often see crowns in various movies and cartoons. For example, we can meet the queen crown on the head of Disney princesses.
Please note that the queen crown that you will draw following these instructions should be symmetrical, i.e. its right side should be a mirror image of the reverse side.
Queen Crown Drawing Step by Step
Step 1. Start drawing the lower part of the crown.
To complete this step, draw two arcs that start and end at the same point.
Step 2. Start drawing the lower part of the crown.
Near the ends of the arcs drawn earlier, draw symmetrical curves.
Step 3. Start drawing the main part of the crown.
On the arcs drawn earlier, draw pointed shapes with curved lines.
Step 4. Add rounded elements to the edges of the crown.
To the right and left of the drawn elements, draw incomplete ovals of different sizes.
Step 5. Add the two side sections of the crown.
You should now draw large and small arcs to the right and left of the crown.
Step 6. Finish drawing the decorative elements.
In the center part of the crown, draw two shapes of different sizes, similar to hearts.
Step 7. Correct the inaccuracies.
To prepare the drawing for coloring, use an eraser and remove the excess lines.
Step 8. Color the drawing.
To color the queen crown, use yellow and pink.


