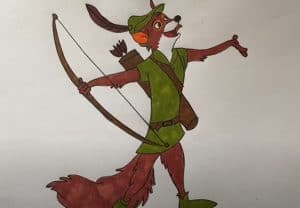
How To Draw Robin Hood (Robinhood the cartoon Fox) with this how-to video and step-by-step drawing instructions.

Please see the drawing tutorial in the video below
You can refer to the simple step-by-step drawing guide below
Step 1
Start with some basic lines and shapes to start your Disney character. Make a circle, for his head, and then add body guides. Don’t forget the curve for his bow.
Step 2
Start sketching Robin’s face starting from the snout and tip of the nose. Next draw the eyes and wear the same hat.
Step 3
Draw the bottom mouth line and shape, then add some details to the left ear. Then you would sketch the left arm pulling towards the bow, and then draw all such body parts including the shirt and all.
Step 4
Finish off the hat by adding a feather, and then completely draw the archer out like that. Finish outlining the right arm and hand, then add some details to the collar.
Step 5
Finish drawing the bottom half of Robin’s shirt, and then start outlining the legs which should also be soft since he’s a fox anyway. Add a belt and continue.
Step 6
To complete this character, all you have to do is outline Robin’s tail, then draw the rest of the legs and shoes like that. Erase the principles and shapes that you drew in step one.
Step 7
When you’re done, this is what Robin will look like. See how good he looks. Color him and you are done drawing this Disney character.


