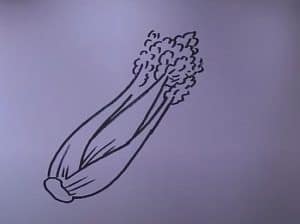
How to Draw Celery easy with this how-to video and step-by-step drawing instructions. Vegetables Drawing Tutorial for beginners and evferyone.

Please see the drawing tutorial in the video below
You can refer to the simple step-by-step drawing guide below
Step 1
First, we draw the outline of celery. You can see that it consists of two parts. The upper part is big and round. And the bottom and stretch.
Step 2
Now we will add some details about both parts. On top of the circle, we draw some circular patterns. On the horizontal section we draw some long, uneven lines like in our sample.
Step 3
In this step we remove additional rules from both parts of our drawing. We also draw the final contours of the upper part to get the complete result.
Step 4
Now is the time to work with the shadows. You can use complex penumbra techniques and draw intricate highlights. But we decided to choose the usual incubation. The blooms lie quite tightly on the transverse part of the trunk. In terms of roundness, the hatch is very light.
These aren’t the most frequent guests of the various drawing guides and textbooks, and you rarely find a celery drawing lesson (which sounds funny). But we think our readers can learn from everything, so this lesson will also be helpful. Among other things, this lesson will be helpful for those who want to master a genre like still-life painting, and draw not only apples and grapes, but also unusual subjects for still lifes like celery.
Anyway, don’t forget that we regularly post new and interesting material on our social networks, such as Pinterest, Google Plus or Facebook, and we would be more than happy if you subscribe to us and Follow for updates on HTDraw.com.


