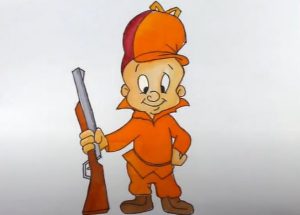
How to Draw Elmer Fudd from Looney Tunes with this how-to video and step-by-step drawing instructions. Cartoon drawings for beginners and kids.

Please see the drawing tutorial in the video below
You can refer to the simple step-by-step drawing guide below
Step 1
To get started, just draw a medium sized circle for Elmer’s head and then add lines on his body in place. Once that’s drawn, you can add guides on his face and shapes for his hands.
Step 2
In this next step you will start by outlining the lining of his hunter hat and then the shape of his round face including his cheeks. Draw ovals for his eyes and then finish the lining for his body. See, so far this is easy right?
Step 3
Step three is also easy. What you will want to do is first draw the cap for his hat and then add some details to it. Then you will give him some pupils and a round nose. Add a smile and then add curves to define his cheeks. You will then add the hat string to the foil side of his head, and then add lining for his coat on the bottom. Draw his boots and then a horizontal line for his outline.
Step 4
This is your final drawing step and all you have to do here is finish drawing his mouth. Add a knot under his chin to his hat and then finish drawing his outline as you see here. Add some detail and definition to his clothes and start erasing all the guides and shapes that you drew in step one.
Step 5
Once you’re done, your Looney Tunes character will appear to look like the one you see here. All you have to do now to finish him off is add some color. You just learned how to draw Elmer Fudd character in Looney Tunes step by step.


