Volcanoe Drawing easy with this how-to video and step-by-step drawing instructions. Learn to draw for kids and everyone.

Please see the drawing tutorial in the video below
You can refer to the simple step-by-step drawing guide below
Step 1 – Draw the Outline of the Volcano
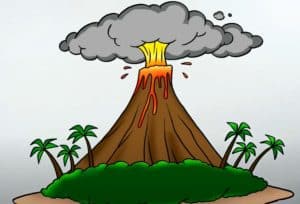
Start with an outline of the volcano itself. Make it wide at the bottom and much narrower at the top with slightly curved and wavy lines for the sides. Make the top opening bumpy and uneven.
Step 2 – Draw the smoke
A large cloud of smoke rose from the volcano. You can define it by a series of curves of different sizes. In general, you want the smoke cloud to narrower at the bottom and then widen as it goes up (just as smoke tends to do).
Step 3 – Draw Lava
The volcano runs down creating some lava trails. However, again try and define them with wavy/uneven lines so they look more natural.
Step 4 – Draw the Volcano Details
To make the volcano look a little less flat, you can give it some detail. Draw them as a series of curved and dashed lines as shown in the example.
Step 5 – Draw the smoke detail & complete the line drawing
Similar to the volcano itself, you can also add some detail to the smoke to make it look less flat. Draw them as a series of more curved lines. You can put some of these close together and some on their own.
After finishing the details of the smoke trail on your lines with a black pen/marker or darken them with a pencil. Just make sure you’re happy with your drawing before doing so.
Step 6 – Color the Volcano
To color the volcano, you can make its main part gray (with a bit of blue in it). Make the lava yellow at the top and red at the bottom with a smooth gradient between the two colors.
Create a smoky gray at the base and lighter towards the top until it blends in with the white of the background.
An easy coloring method for this particular drawing can be colored pencils as well as regular pencils (for gray).


