How To Sketch A Mouth easy with this how-to video and step-by-step drawing instructions. Pencil drawing tutorials for beginners and all.
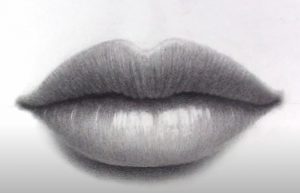
Please see the drawing tutorial in the video below
You can refer to the simple step-by-step drawing guide below
Step 1
Start with sketching the contours. Draw very lightly so you can erase if you make any mistakes. This step doesn’t need to be complicated as long as you can see the lower and upper lip. The upper lip is usually smaller and bow-shaped while the lower lip is wider. Add some lines to the lips to show the wrinkles.
Step 2
Start adding some shading to the lips. Try to keep the center area whiter (especially on the lower lip). This is where the reflection will be.
Step 3
Because of the scribbles, the lips may look a bit messy. Mix the graphite and don’t worry about the wrinkles disappearing. You can always redraw them.
Step 4
Continue repeating the last two steps. 1. add a layer of graphite. 2. Graphite blending. Do this until you are satisfied with the shadows. Add more layers to certain areas if it has to be darker. What can help make texture more visible is to outline the layers in the same direction as the wrinkles.
Step 5
This is where we will add more details. Use a pencil to darken the creases. Don’t draw them too dark and make some wrinkles lighter than others. Use an eraser tool (preferably with corners/points for easier detailing) and add highlights.
Step 6
Add some shine to the skin around the mouth. There is usually a bit of shadow under the lower lip Also darkens the line slightly between the upper and lower lip. There is also often a “philtrum” which is the two vertical lines between the nose and the lips.


No Responses