How to draw Yoshi easy with this how-to video and step-by-step drawing instructions. How to draw cartoons for beginners and kids.
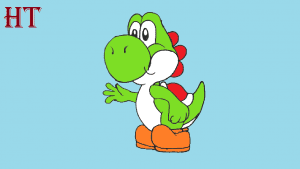
Please see the drawing tutorial in the video below
You can refer to the simple step-by-step drawing guide below
Step 1
First, we outline the contours of our Yoshi’s head. In fact, we usually start with a stickman in case the drawings are difficult. We now have a fairly simple character that we can draw with regular rounded borders without the need for guide lines.
Step 1
Add contours of eyes and cheeks. The eye contour at this stage resembles an architectural arch. The nose and cheeks form a smooth angle. Only smooth lines should be used in this step.
Step 3
In this step we add a pair of pupils and draw the lower contour of the head. Pay attention to the shape and size of our Yoshi pupil. The shape and size of the pupil always conveys the look and mood of the character.
Step 4
If you see our character before you know his appearance. You can see the peculiarity of the arrangement of his facial colors. In this step we will need to draw a line of the cheek that is also the outline of the white and green colors. Also here we add the contours of the nostrils.
Step 5
We drew Yoshi’s head. Now let’s outline the contours of the neck and crest on the back. It should be enough to draw a few teeth in this step.
Step 6
If we were to draw any difficult characters, it would take us a lot of time to draw them by hand. In this tutorial on how to draw Yoshi, we’re simply drawing a three-finger hand with a few circles.
Step 7
Draw the contours of the saddle. It looks like a small hat under Yoshi’s head. Pay attention to how smooth the bottom of this saddle is.
Step 8
We outline the contours of the body. Yoshi’s body looks much smaller than his head. The trunk line should be parallel to the pituitary line from the last step.
Step 9
An example of a cartoon drawing style is the presence of large feet and head combined with a small torso. So in this step we will draw large, round feet.
Step 10
We are about to complete a lesson on how to draw Yoshi. In this step we will depict the contour of our character’s soles.
Step 11
So we remove the excess lines from our Yoshi. We evaluate all contours and proportions, look for errors and inaccuracies. If everything is correct then move on to the next step.
Step 12
In this step we color our character in his traditional color. Notice the color difference between the boots and the seat back.
So that’s the Yoshi drawing tutorial that the EasyDrawingArt team has prepared for you. We hope that you have experienced your progress in art after completing this lesson. See you dear readers of HTDraw.com!
