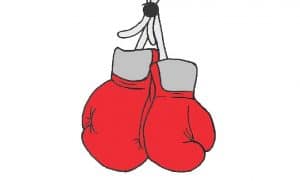
Hanging boxing gloves drawing easy with this how-to video and step-by-step drawing instructions. Easy drawing tutorial for beginners and kids.

Please see the drawing tutorial in the video below
You can refer to the simple step-by-step drawing guide below
Step 1
Boxing gloves are very round and bulky, and we need to show this in our drawings. So we outline two circles and two rectangles on the circles. Initial steps should be performed using very light lines.
Step 2
Let’s make the geometry look like real boxing gloves. Draw the contour of the glove and separate the thumbs. In the upper part, outline the outline, on which there are gloves hanging.
Step 3
Now we need to correctly draw the glove with clear and light bold lines, making the drawing clean and neat. Don’t forget to make the edges thicker.
Step 4
Here we will take care of the details of the boxing gloves. Draw the necessary seams and folds. On the inner surface of the glove, draw a visible part of the hole for the hand.
Step 5
We just have to add some shadow, taking into account the light’s incident angle. Incubating the eggs not only creates such shadow and light, but also creates volume and makes the boxing drawing more realistic and natural.


