How to Draw Uta from Tokyo Ghoul with this how-to video and step-by-step drawing instructions. Cartoon drawing tutorials for beginners and All.
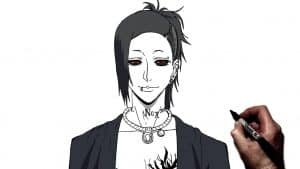
Please see the drawing tutorial in the video below
You can refer to the simple step-by-step drawing guide below
Step 1
For the first step, draw the shape of the head, and the face is made to look like an almond. Sketch the guidelines on the face and then draw the shoulders.
Step 2
Using the facial guides, outline the actual structure of Uta’s face. Notice that the hairline on the left side will also add angle to the face or flat bangs.
Step 3
Finish the hairstyle longer on the left and shave on the right. Add a cross on the right side of the head and note that the ends of Uta’s hair are slanted.
Step 4
Now we will focus on the face. Use the facial guides to draw in the shape of his long crossed eyes. Add a crease in between the eyes and have eye hair at the end.
Step 5
Complete Uta’s face by adding real eyeballs. Add a short eyebrow style as well as the shape of his nose. Draw along the small mouth and don’t forget to add the piercing on the right lip and eye.
Step 6
We’re almost done drawing Uta from Tokyo Ghoul folks, just a little more to go. All you have to do here is draw the right ear, add the details inside the ear and then draw the earring.
Step 7
In this seventh step, we’re going to tackle drawing the upper body starting with broad shoulders. Outline the loose shirt collar he wears, then move on to step eight, where you’ll finish things off.
Step 8
Finally, outline the folds, creases, and folds, then draw thick necklace-like rope and pendants attached to it. Outline the bone detail to the neck and collar, then erase your mistake.
Step 9
When all is said and done, your drawing of Uta should look like the artwork you see here. Now all that’s left to do is add color. Great job everyone.
