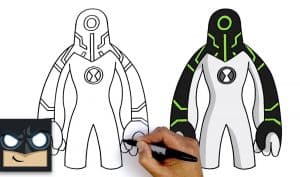
How To Draw Upgrade from Ben 10 with this how-to video and step-by-step drawing instructions. Cartoon drawings for beginners and kids.

Please see the drawing tutorial in the video below
You can refer to the simple step-by-step drawing guide below
Step 1
The first step is very easy. All you have to do is draw a circle for the inside of the Upgrade’s body and then draw a bean shape for the head. Next, draw the right outlined shape for the arm, and then draw a rock-like shape for the lower body. Add other chi lines as you see here.
Step 2
Here, you will begin to sketch the actual shape of the Upgrade’s head and neck. Next sketch the arms and hands as you see them here. Before leaving this step, you will also have to draw marks scattered all over the body.
Step 3
Now all you have to do is finish drawing the arms and hands, then add other marks on the Upgrade’s body. Once done, draw a small circle in the center of the head to suggest the eyeballs, and another circle in the center of the chest for the Omnitrix.
Step 4
Draw the rest of the shape and shape of the body as you see here. This includes legs and torso shape. Now that the arm and hand are drawn, you’re ready to start erasing all the guides and shapes that you drew in step one.
Step 5
Here you have the complete tutorial on “how to draw Upgrade, step by step”. Are you happy? I hope you did. Color it in and all your settings. Join me again guys for more awesome drawing fun!


