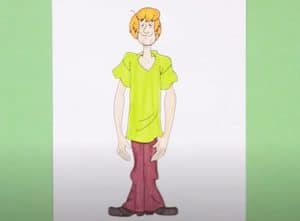
How to draw Shaggy from Scooby Doo easy with this how-to video and step-by-step drawing instructions. How to draw cartoons for beginners and kids.

Please see the drawing tutorial in the video below
You can refer to the simple step-by-step drawing guide below
Step 1
Okay, first things first. We will start this tutorial by drawing Shaggy’s body frame. Start by creating the head section and then draw the guide lines on the face as well as the neck and shoulders.
Step 2
Using the head guide, draw an oblong face and then draw in the bushy hairstyle and secure the bangs as they fall to the left side.
Step 3
Add some detail to the left side of Shaggy’s hair and then start drawing the eyes, nose, then draw the mouth as well as the pointed chin for the bald beard.
Step 4
Now it’s time to draw his skinny, skinny neck and then his baggy shirt. Notice how the collar hangs down a bit because it’s too loose.
Step 5
Finish drawing Shaggy’s shirt as you see here and then outline in the sleeve stitch, and add some creases at the bottom of the shirt. When you’re done, move on to the next step.
Step 6
Now you will start drawing Shaggy’s monkey-like arms. When done, paint over his relaxed hands and then move on to step seven.
Step 7
Now you will complete Shaggy by drawing his legs, and his big long paws. Notice what Shaggy looks like standing there with a smirk on his goofy face.
Step 8
Once you’ve cleaned up the drawing, avoiding mistakes and tutorials, you can start coloring in Shaggy to your liking. I hope you enjoyed this guide to Shaggy from Scooby Doo.


