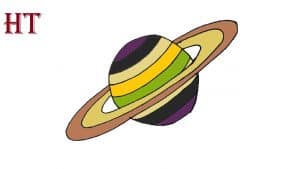
How to Draw Saturn easy with this how-to video and step-by-step drawing instructions. Simple drawing for kids and everyone.

Please see the drawing tutorial in the video below
You can refer to the simple step-by-step drawing guide below
Step 1
In the first step of the tutorial on how to draw Saturn, we will start with a simple one. However, as you can see in the reference image, it will not be a perfect circle.
There will be a small gap left on each side of the circle and this is where the ring will enter later.
Drawing freehand circles can be a challenge, so to make things easier you can use a drawing tool like a compass. This simple tool makes it easy to draw a circle with a pen or pencil. Just remember to leave those gaps if you use the compass and then you’re good to go!
Step 2 – Draw some details for Saturn
We’ll add some planetary details to this step of your Saturn drawing. In real life, Saturn is made up mainly of clumps of gas swirling around a supposed solid core, so we’ll try to recreate this gaseous form for the planet.
You can do this by drawing some curves that pass through the planet’s surface, as shown in the reference figure.
For now, we’ll just do the top of the planet, but we’ll add these details to it later. Once satisfied with the current look, you’re ready to move on to step 3.
Step 3 – Now draw some more lines for the surface of the planet
In this third step of our how to draw Saturn tutorial, we’ll continue adding texture to the planet’s surface.
To do this, simply duplicate what you did in the previous step and draw some more curves on the surface of the planet.
These lines will be below the lines that you just drew and that will take care of the top half of the planet.
Next, we’ll finish the rest of the planet’s surface and draw the ring in the next few steps, so move on!
Step 4 – Add Final Planet Details
Before adding the planet’s famous rings, we just have a few more detailed lines to add to this part of your Saturn drawing.
Now that you’ve got it, and for this step you just need to draw some more curves that you’ve added so far.
These will take care of the details for the lower half of the planet, and the lines should cover the surface as far as the gap the ring will go to.
Then get to the final details before you start coloring in your Saturn drawing.
Step 5 – Now you can draw the ring
It’s time to add the giant circle around the planet in this step of our how to draw Saturn tutorial!
To do this we will use some long curved lines going around the planet to form the ring. These lines will also fill in the gaps you left when drawing the original circle of the planet.
That will wrap up the details in this tutorial, but before you continue, you can also add some of your own!
These details can be smaller like some stars in the background, but you can also draw other planets into the picture with Saturn.
You can also add some other creative elements like a flying comet or even a cool alien spaceship whizzing by!
These are just a few ideas, but here’s one step where you can really get creative with it. What final details and additions would you add to bring this image to life before the final step?
Step 6 – Finish your drawing of Saturn with some color
In the final part of your Saturn drawing, you can perfect it by adding some amazing colors to the image. In our reference image, we kept the colors muted and a bit darker, and you can use this as a guide if you want a similar color scheme for your image.
However, this is your drawing, and you are free to use any color you want for it! You can make the colors light and bold or even make them a little darker if you like.
Then you can have fun experimenting with your favorite art mediums! Whether you use medium to make colors bright and bold or to create a more subtle and faded look, we know this photo will look great.
Your drawing of Saturn is done!
You’ve reached the end of this Saturn drawing tutorial, and you should be very proud of your drawing!
By following this tutorial and doing it step by step, you have successfully recreated this amazing gas giant planet. We hope that this guide will not only make this goal easier for you, but also more enjoyable!
Now you can take this drawing further by adding your own details, elements and color choices. There’s so much you can do to get it done, so we can’t wait to see what you do!
Once you’ve mastered this tutorial, be sure to visit our website for your next drawing tutorial. We upload new ones regularly, so be sure to visit often!


