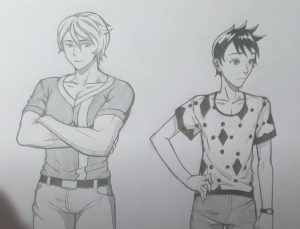
How To Draw MALE ANIME Body easy with this how-to video and step-by-step drawing instructions. Anime drawing tutorial for beginners and all.

Please see the drawing tutorial in the video below
You can refer to the simple step-by-step drawing guide below
Step 1
First of all, let’s learn some basics. Learn your anatomy. Medical diagrams are a good place to start. Prominent are the main muscle groups shown when drawing. Certain groups will show more than others depending on how your character is built.
Step 2
Here are 3 body types you can get. Thin, average, and good-looking people. Most artists tend to stick between skinny and average. It’s hard to get a head that resembles a body that’s too big and often not ‘pretty’. But fear not, testing is key! Tip: See how the different muscles appear as the character gets bigger? Some larger characters have more arms or abs. Again, medical diagrams will help you understand.
Step 3
The jaw line is essential for the feel of the character. In picture a, the chin protrudes slightly, and the jawline is much wider and squarer. This is typical for a man with high testosterone. Figure b shows a stout male, with very smooth curves. His cheeks are slightly sunken and his chin is round. Figure c shows a young male or male. His chin is pointed and the angle of his jaw points upwards more than others. In general, his face is also wider. Note: Also, look at the noses. Mix and match. You might end up with some interesting results.
Step 4
Eyes are very important. They talk a lot about the characters’ personalities. Here are some examples. a) fairly wide and open, but with edges. It doesn’t feel that wide naturally, so is often used for a scared character. b) Quite comfortable. It is neither wide nor narrow. Used for very neutral characters. c) The female adaptation of a. Comes with a much less wild and gentler nature. d) For very observant or sadistic personalities. Young students often feel like they are ‘on’ e) Natural wide, no force. Most commonly used for trusty, good types. Also works well with minimal lashes. f) Angled eyes are often used for sly, scheming characters. Small pupils again show that they are observant.
Step 5
Now let’s start on that picture. Roughen the bone base. Nothing fancy. The blue line shows his movement. It’s good to get the angle of motion and center of gravity right before going any further.
Step 6
The basic shapes for the body are a bit complicated. The ball in his stomach is where everything turns. The top half simulates ribs and has 2 squares for the chest. The bottom is just the pelvis. Often a triangle is enough.
Step 7
Add hands and feet. The cylinder works fine for this part. Legs are a bit harder. The best thing to do is to look at the image of the foot and figure out what shape you see. Use squares and circles for the hands. Timing tip: Notice the smaller left hand because of the viewing angle. The closer to the viewer, the bigger.
Step 8
Add the basics for the head. Map where you want the eye. Use a triangle or Diamond to place the nose.
Step 9
This step is optional. I like to mutilate the body, even if the clothes will cover it. Notice how the right side is stretched and the left side contracted due to his posture. Also note what muscle appears. His abs aren’t visible because he’s bent over, so any excess fat will cover them up. If he was of the ‘body builder’ type, they would still be visible.
Step 10
Start with smaller points. The face, hands, and feet are a good place to start. Look up some shoe styles and try copying from them. Tip time: How is the left foot less detailed? That’s because the further away the subject is from the viewer, the less detailed it becomes. This usually only applies at long distances like landscapes, but it can give a photo some real dynamic. Use this technique sparingly.
Step 11
Add hair and anything around the head area. In this case, the scarf. Due to his movement, the scarf will fly back.
Step 12
Draw the basics of apex. Personally, I haven’t added folds or folds yet. Look in several magazines to find a style that suits the character.
Step 13
Add to the pants. Because they are quite tight, they follow the initial instructions closely. With this type of material, understanding the leg construction is useful when shading the surrounding sun as it will adhere to the shape of the foot. Add some basic folds. Because they are tucked into the shoe, the bottom of it will be wrinkled. Tip: Add seams of clothing. There are very few materials or clothing items without seams.


