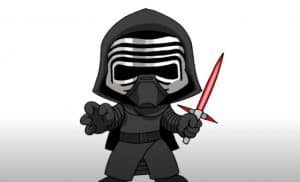
How to Draw Kylo Ren from Star Wars with this how-to video and step-by-step drawing instructions. How to draw cartoons for beginners and kids.

Please see the drawing tutorial in the video below
You can refer to the simple step-by-step drawing guide below
Step 1
Start the first drawing step by creating two shapes. One for the head guide and one for the body contour. Draw according to the instructions for the face and arms.
Step 2
Okay, I think the first thing that should be drawn is the vertical line that crosses the canvas. This will be the hood lining as you will see later. When done, draw the outer shape of the face/mask.
Step 3
Start drawing some faces as the shape of the eyes is part of the helmet’s facial features. Draw a contour or concave shape in the center of the head just above the eyebrows, then draw some detailed lines along the top of the mask/helmet.
Step 4
Here we are going to draw some definitions like the dash line along the forehead, then the contour lines in the middle of the brow. Add a ventilation area that looks like a nose, then add some details to define the helmet to the rest of the surface.
Step 5
Let’s paint more of the hood until it looks like the actual cape design of Kylo’s clothes. Add details and then move on to step six.
Step 6
All you will do here is draw the arms, the gloves, and then the rest of the body shape.
Step 7
Alright, let’s finish off the arms by adding sleeve details. Then draw the hand and stroke on the glove. Paint in chibi, saber style, then add details to the lightsaber.
Step 8
Finally, draw the dress Kylo is wearing and the rest of the cape or cape shape. Don’t forget the belt. Clear the errors and instructions, and you’re done.
Step 9
This is a drawing by Chibi Kylo Ren. Go ahead and color him to complete them all.


1