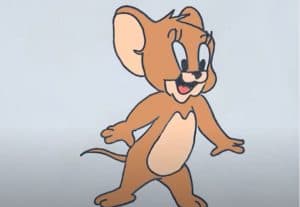
How to draw Jerry the mouse from Tom and Jerry with this how-to video and step-by-step drawing instructions. Cartoon drawings for beginners and kids.

Please see the drawing tutorial in the video below
You can refer to the simple step-by-step drawing guide below
Step 1
To start Jerry we first need to draw a large circle for his head and a pea-shaped oval underneath for his body.
Step 2
Next, draw two short arms between Jerry’s head and torso. For this pose, we’ll draw one of Jerry’s arms up and the other down.
At the end of Jerry’s pointing down arm, draw some sort of clover for his closed fist.
Step 3
Next, draw Jerry’s other hand with four traditional cartoon fingers.
Step 4
Draw two very fat legs at the bottom of Jerry’s body. As you can see from the image on the left, one of Jerry’s legs sticks out just a little further than the other. This helps suggest a very exaggerated pose.
Step 5
Next, draw two small ovals at the bottom of his legs with a small line running down the middle of each oval for Jerry’s feet.
Draw another large oval that takes up most of Jerry’s stomach, which will be a patch of lighter colored feathers.
Step 6
Give Jerry his signature massive ears. Ears facing the viewer should be roughly the same size as Jerry’s entire head. To suggest that Jerry’s other ear is farther away, draw a thin oval instead of a full round ear.
Step 7
Now draw the top of Jerry’s nose and mouth.
Step 8
Give Jerry big cheeks so it looks like he’s smiling and a small triangular nose in the center of his face.
Step 9
Next, draw Jerry’s large oval eyes with two thin lashes at the top of each.
Give him two small eyebrows above his eyes and Jerry’s face is done.
Step 10
Finally, give Jerry a really thin tail that extends from the back of its body, paint it light brown and you’re done!


