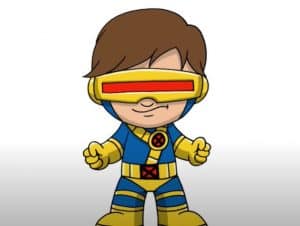
How to Draw Cyclops from X-Men with this how-to video and step-by-step drawing instructions. Cartoon drawings for beginners and kids.

Please see the drawing tutorial in the video below
You can refer to the simple step-by-step drawing guide below
Step 1
Okay, let’s start this first with drawing the shape of the Cyclops’ head. Start with a large circular shape with the facial lines drawn like a large long cross going straight down the middle. Now draw a line going through the bottom part of the face contour as shown. Once done, start sketching the shape for his jawline and chin. then his coat.
Step 2
As you can see here, you will start with detailed sketches to make Cyclops look like Cyclops. Start with sketching his hairline. As you know he has some short hairstyles. Now outline the shape of his optical glasses along with his ears, nose and upper lip. For the nose, you will only need to outline at the nostril and the bottom tip of the nose. Now complete his facial structure by sketching his square jaw and neck. * An easy tip and way to draw a nose is to make a V without a pointed end and add a rounded curve at the tip of the nose.
Step 3
Now, since the character who plays Scott Summers or Cyclops has a very strong face, some more detailing on his jaw or cheeks needs to be worked out. But first let’s study his optical glasses in detail. What you need to do is sketch out the detailed instructions as shown to make the glasses look 3D. Now outline the bridge of his nose on the right side and then the wrinkled lines on his forehead. Now you can sketch in a nice inward curve to define his cheekbones, making his face structure more square. Next sketch in contour for his chin and outline the lower lip. Now detail his leather jacket and ear detail.
Step 4
All you will do in this step is sketch out his hairstyle. Take your time to make this look very real. He has short straight wavy hair that is parted in the middle as you can see. This can be done with a series of long strokes that will eventually give you what you see here. Oh, you also have to slightly outline the left eyebrow.
Step 5
In this step, you will outline the lining in more detail on your leather jacket to make it look realistic and three-dimensional. Study the steps and do as you see. Then listen to all the instructions and visible shapes you drew earlier in step 1.
Step 6
After you’ve cleaned up your sketch and you’ve added some quick shadows as seen here, you’ll end up with a sketch that looks something like the one above. Color him if you want or leave him as a sketch. As with any portrait sketch, I always leave it as a pencil sketch. This is all for this tutorial on how to draw Cyclops from the X-Men.


