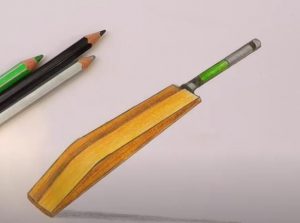
How to Draw Cricket Bat easy with this how-to video and step-by-step drawing instructions. Easy things to draw for beginners and everyone.

Please see the drawing tutorial in the video below
You can refer to the simple step-by-step drawing guide below
Step 1
Draw a large, diagonal, rectangular shape for the cricket bat’s paddle. Round the bottom of this shape and make the top a point. Add a diagonal line to the top of this shape to serve as a handle guide. Add a small circle on top of this line.
Step 2
Thicken the grip of the cricket bat with two parallel lines around the left and right side of the grip guide. Add two curved lines on the top right and left sides of the cricket bat’s paddle.
Step 3
Add diagonal lines inside the paddle to create the wood grain. Add horizontal lines on the grip of the cricket bat to give the impression of duct tape on the handle.
Step 4
Thicken the grip of the cricket bat with two parallel lines around the left and right side of the grip guide.
Add diagonal lines inside the paddle to create the wood grain.
Step 5
Remove the guide for the handle. This may require you to remove some duct tape drawings. If so, go back to redrawing the missing elements once you’ve cleared the guide.
Step 6
Ink the entire drawing with a black ink pen. Let the ink dry for a few minutes and then carefully erase the pencil lines.


