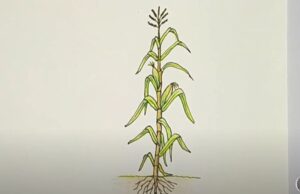
How to draw Corn stalks with this how-to video and step by step drawing instructions. Easy tree drawing tutorial for beginners and all.

Please see Corn stalks drawing tutorial in the video below
You can refer to Corn stalks simple step by step drawing guide below
Step 1. Draw the Vertical Lines:
Start by drawing several long, vertical lines. These lines will form the main stalks of the corn plants. Make them varying in height to create a more natural look.
Step 2. Add Curves for Leaves:
On each stalk, add curved lines to represent the leaves. Corn leaves are long and narrow with a slight curve. Draw these lines coming out from both sides of the stalks.
Step 3. Create the Husks:
Draw long, slender shapes around the upper part of the stalks to represent the husks. These shapes should be slightly curved and taper off at the ends. You can make them overlap with each other for a realistic effect.
Step 4. Draw the Ears of Corn:
Add oval or oblong shapes on the stalks to represent the ears of corn. Place them at various heights along the stalks. You can show some partially hidden behind the husks for depth.
Step 5. Detail the Ears:
Add some lines or details to the ears to represent the kernels. Corn kernels are arranged in neat rows, so you can draw lines running parallel to the long axis of the ear.
Step 6. Refine the Leaves:
Add details to the leaves by drawing parallel lines to represent veins. This will give your corn stalks a more realistic and textured appearance.
Step 7. Add Ground and Shadows:
Draw a horizontal line at the bottom to represent the ground. You can also add some shadows around the base of the stalks to ground them and add depth.
Step 8. Finalize and Refine:
Take a moment to go over your drawing, refining any lines or adding additional details to enhance the overall look. Erase any unnecessary guidelines.


4.5
5