Please see Christmas Candle drawing tutorial in the video below
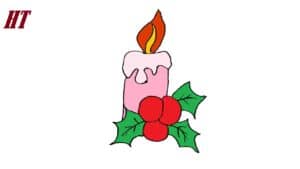
In this tutorial I will show you how to draw a Christmas candle. I hope that you will enjoy drawing this festive attribute and that in the process you will feel the atmosphere of the holiday.
Here is a simple step by step tutorial that will show you how to draw Christmas Candles. Each holiday has its own traditional attributes and at Christmas it is customary to decorate the house with beautiful candles.
In the picture you see a small candle, placed on a stand, it could be a small decorative plate. The branches of the tree are used as an additional decoration. It indicates a beautiful festive composition.
Follow all the drawing steps in sequence and try to accurately depict each element. In the future, you will be able to draw each element separately and create new beautiful drawings.
Christmas Candle Drawing Step by Step
Step 1. Draw the stand.
Using several lines, draw a trapezoid-like shape.
Step 2. Describe the berry.
In the center part of the stand, draw three small circles of the same size in turn.
Step 3. Sketch the leaves.
Above the stand draw a leaf vertically and two leaves located on the sides.
Step 4. Add the candle base.
At this stage, outline two vertical lines.
Step 5. Draw the melted wax.
With the help of smooth curves, melted wax is depicted.
Step 6. Draw the top of the candle.
Draw a line to create a closed loop and add a short wick.
Step 7. Sketch the flame.
At the top, draw the flame using smooth lines.
Step 8. Correct the inaccuracies.
With an eraser, carefully remove all excess lines.
Step 9. Color the candle.
You will need orange, green, red and beige.


