Learn How draw a chicken hen with this how-to video and step-by-step drawing instructions. Easy chicken drawing tutorial for beginners and everyone.
Please see the drawing tutorial in the video below
You can refer to the simple step-by-step drawing guide below
Step 1. Draw the head

First draw the chicken’s head with the beak like two triangles joined together, continue to draw the small face of the hen and inside is a small circle for the eyes. Next draw the crest on top of the head and under the chin there is also a U-shaped crest. That’s the end of the hen’s head, you know that hens also have crests but they are thinner and smaller than roosters.
Step 2. Hen’s neck

Continue to draw down from the top of the head to below, similarly under the chin draw down the hen always has a wide chest. Add details to some of the feathers on the chicken’s neck.
Step 3. Chicken body

Continue to draw the chicken’s chest and belly, the chicken’s back extends into J-shaped lines to form the chicken’s tail.
Step 4. Chicken wings

Continue to draw the chicken wings, we draw the chicken wing feathers with large J-shaped lines to form 2 layers of wing feathers.
Step 5. Chicken Legs

Finally draw the chicken thighs and legs with the front and back legs in the position. Add some details of the chicken feathers on the thighs and the body of the hen because the chicken is always full of feathers :).
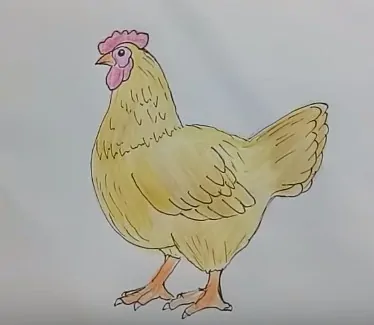
Step 6. Finish and color

Check the drawing again to add more details to make your hen more beautiful and realistic, then color it. Hens are usually yellow, brown or black or can be white and the legs are orange or brown, … you can color the hen in your favorite color.
You can see morse chicken drawings:
How to draw a Rooster Step by Step || Chicken Drawing Tutorial
How to draw a baby chick cute and easy – Cartoon chicken drawing step by step


The game