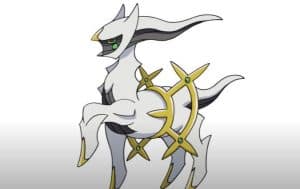
How To Draw Arceus from Pokemon easy with this how-to video and step-by-step drawing instructions. Pokemon drawing tutorial for beginners and kids.

Please see the drawing tutorial in the video below
You can refer to the simple step-by-step drawing guide below
Step 1
It all started with this sassy figure! lol XD It doesn’t look fun doesn’t it? There should be a small oval with a depression for the head and a long circle for the body. Draw four zigzag lines on the bottom for the legs, one more for the tail, and another on the right side of the head.
Step 2
Sketch the four legs as shown. They are quite bulky and have rounded points at the top.
Step 3
Start drawing in the ears and details on the head and neck. Draw around the wiggly line at the top and then outline the tail. Note that the tail is NOT straight.
Step 4
Draw in body details as shown in red. What you draw seems to wrap around the body – it must have a curve to it.
Step 5
Finish drawing the body panels that you started in the last step. On the tips of the feet, draw small curved lines for the design.
Step 6
Draw in the oval area for the face and chest plate, you can call it that. XD Then draw another wiggly line on the top flame part.
Step 7
This is the hard part! If you look at the picture, you see a bunch of bold red lines, right? All red lines need to go. Delete all lines in the areas I have highlighted. It’s a bit confusing with so much going on at once, but just stick to one section at a time and make sure you delete all the sections I showed you before moving on to the next step.
Step 8
Add circles at the four corners of the design on the body. Then finish the face. Again, to the right, you’ll see a few more dark red lines. Delete those lines. And then move on to the next step!
Step 9
When you finish everything and erase the lines I showed you, this is what your image will look like. After all the long steps, you’re finally done! ^ _ ^


